Friday, January 30, 2009

Valentine teabag wrappers and tags

Hey this is a really cool freebie from Whip Up
I was looking for Valentine ideas to make that were quick and easy yet neat.
I came across these wonderful these bag wrapper by whipup.net
http://whipup.net/2009/01/28/valentine-teabag-wrappers-and-tags/

Finished New Pinkeep

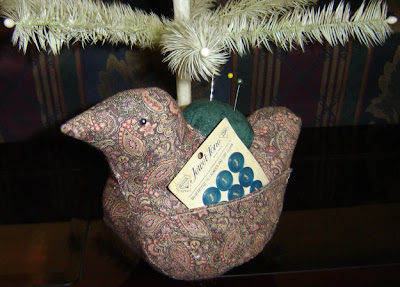
Finally I have finished my newest Pinkeep Which I made from
Denise Davis of SassafrasHillPrimitives.com, Denise has the most wonderful pinkeep patterns..
I buy almost all my patterns from http://www.patternmart.com/ I love being able to buy and print my patterns out right away..here is Sassafras Hill Primitives link
on Pattern Mart
http://www.patternmart.com/patterns/search/section/All/SASSAFRAS+HILL+PRIMITIVES+-+Denise+Davis/All
as you can see already have my pin keep load ready for the hand work I have to do!
I did prim stitching on both pockets and around his beak
I love how deep the pockets are and the pincushion is just the right size.This is a great pattern!

Thursday, January 29, 2009

New Apron for 2009

My first Apron of the New Year
Click on pictures to enlarge
It is reversible..
Side 2..
It feels REALLY GREAT to be sewing Aprons once again, I'm just loving it!
I have two more cut out for my sister..They both will also be a reversible Apron
Poor sis she has waited for these Aprons since before Christmas..
Hugs to all Sherrie

Sunday, January 25, 2009

ValentineTray

Oh gosh I just love this vintage style Valentine Tray!! Isn't it just the sweetest! I found it in my
Craft Daily Up dates..here is the info..I'm running over to the dollar store to buy some Valentines!!! and make this Valentine Tray!! Hugs Sherrie

Vintage Indie shares a tutorial for making this sugary-sweet Vintage Valentine tray, which would be great to use for serving your sweetheart some breakfast in bed
http://blog.craftzine.com/archive/2009/01/how_to_vintage_valentine_tray.html?CMP=OTC-5JF307375954

Eclectic Halloween Artists Group UpDate!!

Eclectic Halloween Artists Group
Did you know that EHAG
{ Eclectic Halloween Artists Group }
is hosting our second giveaway?
*********
Well, we are... and it starts on Monday, January 26th, but if you’d like a sneak preview… please check our blog out now!
The theme for our give away is…
~ The weather outside is frightful! ~
Several members from our talented group of Halloween artists have graciously offered to give a special Halloween collectible art pieces to a group of very lucky winners!
In order to enter, simply click on EHAGArt's blog link below and leave us a comment and your name will be entered in the February 3rd drawing!
http://www.ehagart.blogspot.com/

It's okay to comment anonymously, but please be sure we have your email address so we can notify you in the event you win. If you prefer not to leave a comment you can also email us at ehaagartists@hotmail.com
This last bit is very important, because if we can't reach the winner(s) after 7 days we will draw another name.
The giveaway contest will be going on all week, so check back on February 3rd to see if you won!
In the meantime, you will have a chance to peek at the various art offerings on our blog and on eBay. Why eBay you may ask?
We are also hosting a group challenge of the same theme this week too.
You can find a link to our current auctions here EHAG on eBay.
Wishing everyone who enters wicked good luck!
~ The EHAG artists ~

Wednesday, January 21, 2009

Being Creative in our Art and our Budgets: by Kate Themel

I have been thinking about the cost of sewing no matter what it is you create..Quilting, Dolls and so forth..I ran across this wonderful article by Kate Themel
http://raggedclothcafe.com/2008/12/15/being-creative-in-our-art-and-our-budgets-by-kate-themel/
It made me think about our ancestors..thinking of the turbulent times they lived through just like what many of us are going through now..Yet many gorgeous quilts , dolls, fashion, still flourished and made art what it is today..a huge answer is recycle!
Example my husband really needs his closet sorted out and instead of giving away his shirts I am going to cut them for fabric.. and letting the family know to hey throw your discarded clothes my way..Think of the dolls and quilts and so on that can be created from that alone!
The article below is so worth reading I hope you enjoy it as much as I did..Hugs Sherrie

It has been named “Issue Number One” on news programs, radio spots and around the dinner table. How does financial trouble affect our ability to create fine art? And what can we do to lessen the effects?

The making of fabric art and art quilts can be expensive, compared to paper and watercolors or charcoal pencil. As artists, we often make sacrifices in other areas of our lives in order to pursue our creative goals. Sometimes this means adjusting our budget so we can buy materials. But


usually we are not willing to compromise our design by using cheap materials. I’m sure I’m not the only one who debates silently while wandering around my favorite fabric store: “Hmmm…. $9 per yard? A little pricey but I love it! And I love THIS one… and I must have THIS one… Well, I can go another year with this coat… and if I promise not to go to Dunkin Donuts on the way home….” The store owner has gotten used to the sight of me standing for long periods of time staring off into space.


Clearly, the economy has slowed down. Many people have lost their jobs and some have lost their homes. More than once, references have been made to The Great Depression of the late 1920s and early 1930s. Most Americans had to cut back drastically on their expenses. In many households, buying fabric for colorful and decorative quilts might have seemed impractical. But many beautiful quilts were made during this time period and not all were made by wealthy women. How did they do it? What can we learn from that era that can be applied now?

depressionquilts

Waste Not

Then: Feed sack and scrap quilts were popular during this time. Contrary to popular belief, scrap quilts were rarely made from “worn out” clothing. For practical purposes, it wouldn’t make sense to spend time and effort making something out of a weakened fabric. Most of the time, the scraps were leftovers from other projects using good quality fabrics (i.e. curtains, table linens, clothing). Rather than throw out the small pieces, women would save them in hopes of getting different colors or patterns from their friends’ stash. During their fabric swaps, women would often trade patterns, iron transfers and templates.

Now: Although feed and flour sacks have become a thing of the past (except in reproduction fabrics), the practice of saving and trading can be applied today, especially with our renewed focus on conservation of resources.

Dresses made from flour sacks, worn by children in a coal mine community. 1937

Dresses made from flour sacks, worn by children in a coal mine community. 1937

Share Expenses

Then: When buying fabric was too expensive for one quilter, often women would work together. One popular example was a system known as “halves”. To save time and money, 2 women would pool their fabric and agree on a pattern. One woman would piece together 2 quilts and another would quilt both of them. In the end, they would each keep one finished quilt.

Sometimes a bargain could be struck with a client who had some money but no time or no sewing skills. That person would buy enough fabric for 2 quilts. One finished quilt would go to the person who bought the fabric and the quilter would keep the second one as payment for her work.

Now: This idea works well for people who make traditional quilts, but with some ‘tweaking’, the idea could be used by fabric artists. For example, 2 artists may use similar materials such as bleach, resists, soy products etc. They could pool their money and buy products in bulk, often getting materials at a lower cost. Some fabric artists share fees so they can buy large ads in magazines and periodicals. This provides greater market exposure for everyone in the group and cuts down on each person’s financial burden.

Barter

Then: Many times, women would trade a finished quilt for food, goods or services; they might even trade animal feed for a quilt made from the feed sacks.


Now: Almost anything can be traded for your artwork, if you are able to quantify its value. Many people would love to buy art but cannot justify the cost in their minds, especially if they are worried about their job security.

“Ace McGunicle, Quilt Detective” writes about her experience in “The Case of the Battered Quilt”: http://www.noqers.org/mysteries/barteredmyst.html


As Ace demonstrates, you don’t have to barter for fabric or art supplies. Maybe you need help moving or housecleaning and another person needs a unique and creative present to give to their mother for Christmas. We just have to think as creatively when it comes to business, as we do for our designs.

This quilt, made from sack scraps, is for sale by American Antiques,

This quilt, made from sack scraps, is for sale by American Antiques, http://www.antiquequilts.biz

In many households, women organize the budget and set priorities for the family. Often we are inclined to sacrifice our own needs for those of our children or spouses. We can fall into the creative “booby trap” when we downgrade our artistic passion to a hobby or a luxury. Of course I’m not suggesting that people let their children starve so they can buy fabric. Sometimes all but the basic necessities have to be put on hold. But if we have any discretionary funds, there are ways to pursue our artistic dreams without breaking the budget.

As an artist, have you been impacted by economic events? What kinds of ideas have you heard or tried in order to save money while remaining artistically active?


Facts about Quilting during the Depression were gathered from these sources:

http://www.womenfolk.com/frugal_quilting/quilt_business.htm

http://www.historyofquilts.com/publications.html

http://amp.wpcamr.org/archives/89

Monday, January 19, 2009

Vintage Cloth Doll Making (Group)

I wanted to let you all know about the Vintage Cloth doll making a yahoo group is having a really awesome challenge actually two options challenge..I have decided to do the Presbyterian cloth doll challenge..It is really a fabulous pattern created by Lucinda C. Durbin (Cinders)
I hope you all will think about joining too..This is a incredible group of doll makers,,Warm friendly always right there to help in any way..This group has been around 10 years I know of..I feel like their all family..


http://groups.yahoo.com/group/VintageClothdollmaking/

here is the info on both challenges......
Our current group challenge has TWO options!
First Option: To recreate a historic Presbyterian cloth doll using a pattern created by Lucinda Durbin. (Lucinda used her original Presbyterian cloth doll in creating the pattern!!)

According to Linda Edward, on page 28 of her book Cloth Dolls From ancient to Modern - "The First Presbyterian Church of Bucyrus, Ohio, started making rag dolls in 1885 as a fund raiser. These dolls measure about 17 inches (43 cm) and have hand painted faces. Their bodies are made of unbleached muslin which is stuffed with cotton and they are jointed at the hips and shoulders. The mitten shaped hands have fingers indicated by stitching. Their feet are stub shaped. The dolls and their original clothing, consisting of an ankle length dress and prairie bonnet, are all hand sewn.

In 1956 the church again made these dolls using the original patterns, however, the differences in the finishing and fabrics make them readily discernible from the older version. The hands of these latter dolls do not have the fingers stitched and the oil paint used for the face and hands is very heavily applied. The fabric used for the clothing is also easily identified as being from the 1950's."

You will find the pattern and pictures of Cinders' doll in our files:


You may also want to refer to her photo album for some progress pictures of her own Prysbella coming to life!


Second Option: To create a molded face doll-could be a Kaethe Kruse,Helen Pringle, Izannah walker , or Lenci type.
If you choose this option, be SURE your outer layer of the molded head is cloth, to qualify.

Linda Edwards gives quite an extensive presentation in her book about Lenci dolls, starting on page 86.
Her Izannah Walker discussion starts on page 21.
The Kathe Kruse presentation starts on page 34.

DEADLINE FOR COMPLETION: APRIL 5, 2009!!!

Be sure to post progress pictures of your dolls while you're working on them. Share your tips/thoughts on construction techniques you've used. We all need to learn from each other along the way!
Have your pictures placed in the challenge folders by midnight April 5, 2009 to qualify

I'm excited to see what you all come up with for this challenge! MaryColgan

Critiquing New Face


I have been practicing faces by using nothing but Artist pencils /watercolor..
I would really appreciate any Critiquing on this face..I am at a stand still now..I see
by a third eye posting my doll face..
I am not happy with the face..it is still heavy handed to me..I lost is totally on the eyebrows..But I am noticing the shadowing..This is where I am blocked standing still..I know it needs more depth but I do not know how to get the depth with out getting heavier..
this is also my first attempt at a bit of sculpture around the nose..at least it isn't a piggy nose:)
Feel free to Critique and be as blunt as you want!!!!
Okay after I posted above..I went back and worked a bit more with her..I tried my best to remove her eye brows
Then tried adding a bit more shadowing behind her eyes and bottom eye lid.
I attached her head to the body...Please do
Critique and be as blunt as you want!!!!
Alrighty here again is the face I have ..Tried my best to tame her nose down
darkened her eye brows a bit more..at this point I'm afraid of doing any thing because I always over do..and am trying to keep her light handed...

Pattern Mart Newsletter

I love Pattern Mart..wanted to share with you all all the newest patterns from so many very talented artists!! Hope you will stop by and see their amazing patterns...Sherrie

Letter from the Editor Kelly Arvay

I want to take just a moment to remind everyone that Pattern Mart offers all kinds of different patterns - not just sewing patterns. So be sure to check out all the patterns at the following link: http://www.patternmart.com/patterns_list.php.

Visit the Newsletter Archives if you've missed any of our past issues. Also there are a few days left to visit http://www.patternmart.com/survey.php and take the current survey . There's a free pattern to download after you complete the short survey.

Don't forget to click on the "Tell a Friend" button when you find patterns or supplies that you'd like to share with your friends. This button can be found above the pictures of the items you want to share.

Have a wonderful week,

from the Editor Kelly Arvay

Sunday, January 18, 2009

Little Dollings

I just spent two wonderful hours at Brenda O of Magic Gardens
http://brenda-magicgarden.blogspot.com

The time just flew by..I enjoyed each and every one of her creations..
Each having their own wonderful personalities..I have watched Brenda grow and grow,There is no stopping her incredible talent.. She not only has incredible talent but her imagination is
just as incredible !!
Brenda has changed her name from Magic Gardens to "Little Dollings"
her ebay id is little*dollings

Take time out of your busy day and go by and visit Nrenda's Little Dollings
and just each one with their whimsy and hearts of love change your day for the better..
http://brenda-magicgarden.blogspot.com

Pinkeeps by Denise Davis Sassafras Hill Primitives

This is the picture of the pattern of the pinkeep Iam working on..it is a awesome pattern by Denise Davis, Sassafras Hill Primitives..

Tomorrow I will add my pictures of my pinkeep Im making from the pattern.All I have to do is stuff it now.... as promised here is my PinKeep , I made from Denise's pattern..I am going to add decorative stitching by hand to the pockets..
SassafrasHillPrimitives.com has the most wonderful pinkeep patterns..I buy all my pattern from http://www.patternmart.com/ I love being able to buy and print my patterns out right away..here is Sassafras Hill Primitives link on Pattern Mart

http://www.patternmart.com/patterns/search/section/All/SASSAFRAS+HILL+PRIMITIVES+-+Denise+Davis/All

I Love Denise's patterns I think I own all of them..Her pin keeps are wonderful..Hope you enjoy!! Sherrie

Thursday, January 15, 2009

Friendship Award!

My sweet friend Marcel over at http://auntpittypats.blogspot.com/ has given me an award. Marcel is truly a sweet person and soooo talented and I'm honored to have her as a close friend.
Now I have to pass this on to 8 awesome ladies...
Meaning Of Award:
What this Friendship Award means:
This blog invests and believes in Proximity- nearness in space, time and relationships.
These blogs are exceedingly charming . These kind bloggers aim to find and be friends .
They are not interested in prize for self- aggrandizement!
Our hope is that when the ribbon of these prizes are cut ,even more friendships are propagated.
Please give more attention to these writers! You are suppose to pass this award on to 8 fellow bloggers, to include the above text in there blog. So with new and wonderful friends ships formed I have given it to this 8 fabulous ladies.Who have helped me in so many ways,
#1 being such a good friend to me ,and supporting and encouraging me no matter what!
Thank You I love each of you!
In no order just equal love and friendship.
#1: Viv
#2:Sandi
#3:Judy J
#4: Lisa
#5: Primgal
#6: Cathy
#7:Susan
#8:Linda

Wednesday, January 14, 2009

Izannah Walker dolls, Helen Pringle dolls,

I repeated my post here..People were emailing me asking for this post so here it is once again Thank You !!Sherrie
Hi every One, I belong to a online group called Vintage ClothDoll Makers
It has been around for years and years..They have been talking about. Izannah Walker dolls, Helen Pringle dolls, and and talking about the doll makers of these dolls, and all the wonderful techniques, This is what makes this group so extra special.
I wrote a rather long post below to the group and also wanted to share it here on my blog....
Going through my notes that I have saved over the years, I was so excited to have found the messy mixture!! I wanted to share a couple awesome techniques by out standing artists with you all , Even if it is just to keep in your notes , These gals are just amazing and the doll world will never be the same because of their sharing hearts and experience.
************************************
The Cloth Doll Magazine, 1988"Miracle Messy Mixture "For Strengthing Cloth Doll Heads" By: Helen Pringle

A mixture of one half modeling paste and one half acrylic gel medium.

Applie in multiple thin coats to the doll head and arms before they are painted.

The brand I use is Liquitex Modeling Paste and Liquitex Acrylic Gel Medium,available at most craft and art supply houses,

(Arylic Matted Medium could be used in place of the Gel Medium,,But the Gel Medium makes a smoother mix which doesn't show brush marks)


Buy the smallest sizes you can get, as the paste begins to harden once it is opened. Use a good brush and save it just for the mixture.

I've tried every kind of brush , and found I prefer a 3/4 " soft nylon "exploded tip" as it seems to minimize brush marks and cleans easily.

Cover your work surface with plastic sheeting or newspaper.

Mix well one part paste to one part medium in a clean, small glass jar with a tight fitting lid and a mouth wide enough to admit the brush easily such as a pimento jar,

I add water sparinly, a few drops at a time, when the mixture begins to thicken.If too much water is added , poor adhesion will result
Clean up is done with soap and water.

The features and the shape of the head and arms are less likely to shift or flatten, as sometimes happens in old rag dolls painted directly on the cloth.

The hardened surface makes an excellent base for the painting which follows ,

Whether using acrylics or oils.(Remember that oils can cover acrylics,
But not vice versa, If in doubt read the labels on the jars and tubes when painting .)

While testing various under coatings, I always coated a head and then slammed it repeatedly into a table corner.
Acrylic varnish cracked, gesso cracked, but not the
"Miracle Messy Mixture ".

The coated head finally tore. But even deep dents slowly healed,

The purpose of this method is to prolong the life of the paint and to help avoid permanent dents,It is not meant to imitate other materials or mediums, or to fool any one.
Technique written by:Helen Pringle
*******************
Technique written by:Nancy Gibbs hardening techniques for dolls she uses a technique based on Helen Pringle's recipe in which you combine a mixture of acrylic gel and acrylic modeling paste in a 1 to 1 ratio. use your fingers to apply to the doll's face after needle modeling, but before painting, you can use fingers to spread it -it does dry quickly. for a smoother less marked appearance spray lightly with water sand thoroughly once it dries and reapply. repeat this process as desired,the more coats, (thin ones--thick ones crack), the smoother your final finish. paint as desired. Nancy Gibbs says she usually paints the flesh color in two layers, sanding between, then the features such as eyes & lips etc. you may wish to varnish, crackle or apply other techniques to the hardened surface for a variety of looks. the finished result is vinyl-like and smooth to the touch. Technique written by:Nancy Gibbs *******************
To stiffen the fabric to prepare for painting:
Heirlooms for TomorrowFrom Heirlooms for TomorrowBy: Linda Johnson... which features original dolls by Linda Johnson. She has created a tutorial on how to create Helen Pringle style dolls, with a wonderful section on painting and finishing faces, creating trapunto-style sausage urls, etc. http://www.heirlooms4tomorrow.com/Technique written by: Linda Johnson
http://www.heirlooms4tomorrow.com/Preparingadoll.htm
To stiffen the fabric to prepare for painting:
Materials needed:
Doll body with sewing finished except for attaching arms and legs
1 inch width stiff bristled brush (or smaller for smaller dolls)
1 inch Sable brush or fine haired brush
Liquitex modeling paste (a pint will do many dolls)
Liquitex Gel medium (a pint will do many dolls also)
Liquitex Gesso (I use white but colored is okay)
(I use only Liquitex products for the preparation!! The others that I have tried get really chalky and/or crack!! They are available at any art supply store....and Walmart in some areas. I get mine from Michael's craft store. I am sure there are cheaper ones,
but don't skimp here! For one doll, the smaller quantity will do. I buy it by the gallon!!)
Quilting thread or heavy thread (color doesn't matter)
Paper clips or Safety Pins
Clothes Hanger
Masking Tape (get the good stuff!)
Plastic wrap or large plastic bags big enough for the doll
Fine sandpaper
A water mister if you are doing it in a dry area
Directions:
Wash the fabric you are using for the doll to remove any sizing or dust. (I heard that argh!!!)
The doll pattern I use is my own. It is a one piece body with the head attached but without the arms and legs sewn on.....yet. Any pattern will do! I was thinking that Elinor Peace Bailey's, "Anne of the Celtic Mist" ( or similar patterns) would be cute done this way! Make sure that all of your body (ears, noses, breasts....etc.), fingers, toes and joints are finished!
Note* If you have never painted a doll before and you are not confident enough to paint right on the doll, start with a 'pancake' type doll. (a two piece doll like a raggedy ann or basic rag doll) Trace the head on fabric, prepare the fabric like these directions tell you, and paint that. You can use an old embroidery hoop that is bigger than the head to keep it tight if you want to, this just makes it easier to paint. Then sew the face on when you are finished painting and sealing it. Make sure you use masking tape where you are going to sew. It is very difficult to sew through the painted part.
Now Get Brave!!
I mask off the doll body with masking tape and plastic wrap on the areas I don't want to get the messy mixture on! This leaves the areas I want to prepare for painting exposed. I mask it like you would see on a bisque doll head with the squared off shoulders. Then I sew a cord to the bottom of the doll and tie it to a paper clip for hanging on a clothes hanger later for drying.
You can do the arms and legs the same way. Mask off the ends that are going to be sewn to the body. I mask off about 1 1/2 inches on the top of the arms (leaving the hand and forearm exposed) and about a 1/2 inch from the knee up (leaving the shin and foot exposed) You want to leave the masked areas as just plain fabric so you can attach them to the body!!
Sew a 3 inch or so doubled quilting thread to the bottom of each. Attach a paper clip or safety pin to the end of the thread.
I use the paper clip to hang them from a clothes hanger later when they are drying. Then, I put them in a closet or a place that is not being used often...it looks kind of gruesome with all of those bodies, arms and legs hanging upside down....he he he. Or you can put them in a coffee can, weight it with rocks or marbles or something so it doesn't tip over.
Here we go!
I mix a 50:50 blend of modeling paste (a marble dust mixed in a latex base) and gel medium. I use a well cleaned plastic butter tub with a lid to mix it in. That way you can leave it over night and it won't dry out.
Using a 1 inch width brush, I apply the first coat heavy enough to not see too much fabric showing through. Try not to get large built up areas but you don't have to worry about brush strokes at this stage. Use your brush to remove excessive mixture from creases, like around the ears and nose. If it starts to dry too fast, mist it with water. Let it dry over night in an undisturbed area, upside down hanging from its paper clip.
Apply the second coat in the same manner. Let dry overnight.
At this stage, you shouldn't be able to see any fabric. Lightly sand out any brushstrokes. Don't sand too hard or you will go down and damage the fabric! Use a slightly damp soft cloth to remove the dust.
Apply the third coat. Let dry overnight.
The surface should be now hard and warm. If it is white all over, lightly sand out any brushstrokes. Use a slightly damp soft cloth to remove the dust. (If it is cool and splotchy with gray spots, it is not dry yet! Also, If it is not hard all over when you tap with a fingernail, you will need to apply another coat and sand it.)
I mix my Gesso with the gel medium: two parts gesso to one part gel medium. Apply two coats of this mix allowing to dry completely between coats. Sand if it needs it.
If at this point you have any 'craters' that you are not happy with, you can let the modeling paste get thick by letting some air dry a little and fill in the craters.
[I wrote to Liquitex and they said that you can glue (using the gel medium) on top of this. I had asked this because I decided to put ears on her after I was at this stage. This would be great for clay parts too.]
All Right!! You are ready to paint!! It looks cool now huh? A face waiting to happen!!
I leave the masking tape, plastic, and the paper clip on until I am finished painting. Take care when removing the masking tape after you have painted it so that you don't chip the paint.
You can use either oil or latex paint on this. It is whatever you prefer! The traditional method is using oils with linseed oil to give the face depth and easy blending abilities, but for those of you that can't use oils because of health reasons, latex is just great! Oils take longer to dry though, but the effect is worth it! From doing research and from experience, using cobalt or Japanese dryers to make the oils dry faster, allows cracking and peeling over time! Always use oils in a well ventilated place!
*******************
Also in closing here is a couple links of some wonderful doll artists who create or collect and Love Izannah Walker dolls, Helen Pringle ,I'm sure you know them all. Some times even if you do not agree with the style of the doll..It is the techniques that is what makes it so interesting.. .But gosh golly it is always wonderful to look and drool again!! what I call truly yesteryear dolls..my heros for sure! Hugs and Blessing...Sherrie
http://plain-n-simpleblog.blogspot.com/
http://atticbabys.blogspot.com/
http://edythoneill.blogspot.com/
http://maijaandme.blogspot.com/
http://theblackberrybriarwares.blogspot.com/
http://northdixiedesigns.blogspot.com/
http://www.picturetrail.com/clciampa
http://anniebeezfolkart.blogspot.com/
http://ladysrepositorymuseum.blogspot.com/

Please meet Marsey

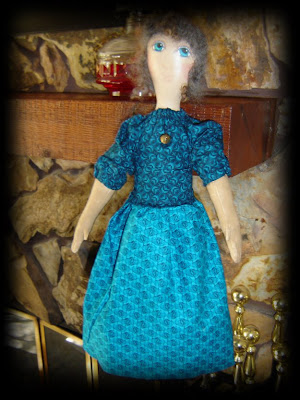
Just wanted to share with you all .....Please meet my little Marsey..yeppers
I have finished another Prim for my Lemon Poppy Seeds Shop
Marsey is 20 inches and a SympleTymes original
Oh Gosh!!! if ya must see me legs:)Marsey standing she has needle felted lambs wool for hair.back view of Marsey's dress
Front full view

Ludwiga created by: Becky of Cloth N Clay

Ludwiga created by: Becky of Cloth N Clay
Oh Gosh you must stop by Becky's of Cloth n Clay and see her dolls..Their all beyond words just amazing..Her Ludwiga inspired by the Andreas Voit paper mache's of the 1800's
Ludwiga looks as though she is going to speak at any moment she is so life like.
http://clothnclay.blogspot.com/
I sit and study Becky's dolls ..every thing about them is just perfect..Look how perfect Ludwiga
head and facial features proportions are..
I just can't imagine taking a cloth head and paper mache or clay and creating a doll like this..
her ears and mouth and chin , skin tone all are just perfect.
To me this is true beauty from inside out..I sit and wonder how in the world Becky created a dimensional head..did she take a pancake doll head then build it up with clay??
ack!!! the questions I do have grr:)

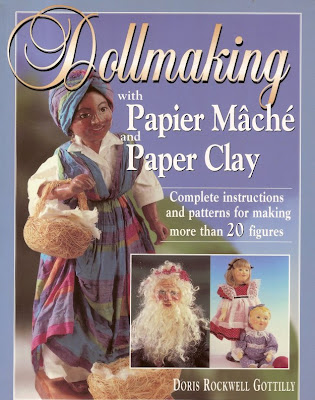
I pulled out my book
have REALLY started studying it..I am just not into making armatures and creating a whole doll from clay..i would just like to create a cloth doll then use paper clay only on her head and facial features.. so far in this book it is over whelming seeing how their creating a doll using a armature and foil, styrofoam, build up. whew..
also in-between making new 2009 dolls for my lemon poppy Seed shope..
I have been searching for antique doll faces and then on
flat cloth I have been practicing with water color artists pencils drawing and shading .
Boy I am so determined..One of these days I will surprise you by sharing my dream doll that
I made!

Tuesday, January 13, 2009

Surfing This N That

I 'm surfing tonight just looking and drooling while my sweet hubby is watching a movie..He is in his comfy chair and I'm on the couch with the lap top..aww what quality time:)
I would just like to share my findings that I am searching for Antique doll faces... and all those goodies I find along the way you know the kind that make ya go oh my gosh!!! and you wish you could buy them all :)
I fell in-love with these buttons!!
Vintage Paper Doll Face Fabric Self Cover Buttons
http://cgi.ebay.com.au/VINTAGE-PAPER-DOLL-FACE-FABRIC-SELF-COVER-BUTTON-x-3_W0QQitemZ370143523208QQcmdZViewItemQQimsxZ20090112?IMSfp=TL0901121210001r7182#ebayphotohosting

This is a cool site!:Doll Reference web site, a guide to doll collecting and identifying dolls from 1800 to the 1970's, Antique to Vintage dolls, over 10,000 photo's, descriptions and markings are included. Dolls are listed by the doll manufacturer on each pagehttp://www.dollreference.com/

This gal has a great blog sharing her own collection of
http://vintagecutetdolls.blogspot.com/

Stuffed a Gathering of Softies Magazine

Stuffed a Gathering of Softies Magazine
I went to JoAnns Sunday whoHoo using a couple of my Christmas JoAnns my family gave me..What a dream it was too.Not only was it a dream shopping spree but also had my trusty JoAnns coupon and man were they having a blow out sale..Even patterns for 99 cents!
I bought gorgeous fabric for a valentine Apron swap.

Kisses and Hearts Apron Swap

OOOoo I could have spent tons of money just on fabrics..But I did pace my self ..While I was there I treated my self also by buying the first issue of the new Stuffed a Gathering of Softies Magazine
I couldn't believe the price $14.99..but with JoAnns 10% on all magazine I bought it along with Soft Dolls and Animals..I have to tell you I felt like a queen for the day!

I have to tell if you LOVE softies or mix medium art
Stuffed a Gathering of Softies Magazine is the magazine..I LOVE IT!
It is a keeper..One you will use over and over again..Full of bright beautiful pictures, techniques,that you can use any medium you are in.
Loads of patterns, Inspiration galore!
The sweetest and cutest Softies ever! Awesome Artists giving their techniques and patterns just a delight to read about the personal sides of the artists .
It is a bi-monthly magazine..Also it isn't one you can sit down and read all at one time.
I have beeen reading since Sunday..there is 143 pages loaded with so much ..
All I can say this is one magazine I will continue to buy thats for sure..
Why?? do you ask??..simple it is just #1: SO inspiring
#2: Techniques you can use in any medium not just softies..

My First doll for 2009


My First Doll for 2009!
This sweetie was inspired by a antique doll of the 1800's..
She is very worn from years of a child's love, Her eyes of blue still shine through.
Irene is tall and a bit chubby. Irene's head has been gessoed, sanded many times, painted with acrylics artists, paints for her features and hair , sealed to last many years.
Irene has been aged to give her my wonderful reminiscent of yesteryear!

Irene will be in my Lemon Poppy Seeds Shop on Jan 15th our new update!!
Please stop by and see all the wonderful and talented Lemon Poppy Seeds Artists!!
http://www.lemonpoppyseeds.com/shoppes/pssympletymes/

Sunday, January 11, 2009

Georgene Novelty Averill Hendren Cloth Doll Vintage '30


Today I was surfing ebay..I was looking at antique doll faces..studying them, Enjoying their many years of history behind them, Always wishing I could own just one of them, but to be honest I rarely buy from ebay any more, usually it is directly from the artist or esty. I came across this beautiful Georgene Novelty Averill Hendren Cloth Doll from the 1930's..Just look at her GORGEOUS face! I do not know know any thing about this type of cloth doll, But to me her face just looks to fresh to be from the 1930's, What do you think??

Description:
Wonderful, antique cloth doll made by Georgene Novelties, which was a division of the Georgene Averill, Madmae Hendren Doll Company. Madame Hendren made character dolls made of compostion during the early part of the 20th century. These dolls were only marked with paper tags, but there is a picture of a doll very similiar to this one (except one in the book is missing her bonnet and has different style shoes) on page 135 of Jan Foulke's book 3RD BLUE BOOK OF DOLLS AND VALUES.

This pretty toddler doll is from the 1930's, all cloth with a mask face and painted features. She has lovely blonde, yarn hair, very detailed face, moveable arms and legs. She has very pretty clothing, all original with oil cloth spat shoes. Nylon socks, and pink one piece underwear, pink dress trimmed in white lace at the sleeves, and a wide-brimmed, pink bonnet. Doll measures 18" tall.

She has a metal shoulder plate within her cloth body to give stiffness to her head and shoulder area. Very well made and VERY clean. No stains, tears, excellent shape. Great face color.

http://cgi.ebay.com/Georgene-Novelty-Averill-Hendren-Cloth-Doll-Vintage-30_W0QQitemZ280300497445QQcmdZViewItemQQptZDolls?hash=item280300497445&_trksid=p3286.c0.m14&_trkparms=72%3A1240|66%3A2|65%3A12|39%3A1|240%3A1318|301%3A1|293%3A6|294%3A50

Thursday, January 08, 2009

"Stuffed", a Gathering of Softies

A Brand New Magazine called "Stuffed", a Gathering of Softies! for all us softie lovers is out... Look for it at your local newstand or bookstore.
Lisa from " QD PATOOTIES" http://qdpatooties.blogspot.com/ has her sweet and beautiful
Softies!! On the front cover of the inaugural issue of Stuffed, a Gathering of Softies!
Go by Lisa's blog to see more detail and check out Lisa's Free Softie patterns she has so wonderfully offered to us all.
also in the ..."Stuffed", a Gathering of Softies another talented artist Tascha ... http://timewithtascha.blogspot.com/ has her beautiful softie "Little Lizzy"..

"Stuffed", a Gathering of Softies is on news stands now. This magazine is full of wonderful dolls from many talented artists.

Wednesday, January 07, 2009

Creative Cloth Explorations Adventures with Fairy-Inspired Fiber Art

Patti Medaris Culea author of:Creative Cloth Explorations
Adventures with Fairy-Inspired Fiber Art

Creative cloth explor cover

I got this wonderful book for Christmas and This book is filled with fantastic techniques, and with excellent photo's to help you do the projects. Even though the book is about flat objects... any of the techniques can be used in doll making. Patti is known for her doll making, especially faces, and this book includes some flat dolls also..Paper dolls...

Creative Cloth Explorations
Adventures with Fairy-Inspired Fiber Art

This book is the fifth installment on making creative cloth fiber arts from popular art doll designer, fiber artist, and workshop instructor Patti Culea, following Creative Cloth Doll Making, Creative Cloth Doll Faces, Creative Cloth Doll Couture, and Creative Cloth Doll Beading. Readers will learn to make flat figures, fabric books, and a fairy-style fan.

This book builds on the previous four by delving into how to make fun and elaborate-looking projects using similar materials for unique projects and book structures. Culea covers the basics and provides new techniques–such as using Shiva paint sticks and stencils, working with silk rods and waste, and using lace and trims–while teaching you to how create a flat-figure doll, a memory journal with embellished cloth pages, and a beautiful fan. Professional tips, ideas for embellishments, cutting-edge techniques, and complete patterns for all the projects are included.

Patti Medaris Culea studied art in Los Angeles and Japan and began as a painter and portrait artist. She has a full-line of cloth doll patterns and her work has appeared in books, magazines, and galleries.

Dance with the Fairies By: Elino Peace Bailey


FREE Pattern!
Dance with the Fairies By: Elino Peace Bailey
Perfectly Extravagant Pincushion/Pinkeep

ALERT!!! Crafters of handcrafted items

CPSIA will it effect YOU?
http://www.cpsc.gov/about/cpsia/cpsia.html

If you have not heard or read about this change in law or think it won't effect you ...check out the link! read the info and them contact your elected officials for help im protecting the small business owners!

This is NOT just about Toy Makers who want to sell but each and everyone who sells handcrafted items. It will effect you and
the ability for you to sell your products after Feb 9, 2009.

ALERT!!! Crafters of products of toys for children! You are about to have to pay to have every product tested for lead! Even wood toys and cloth dolls!!!

Overview and Discussion here: http://www.craftlister.commessage_board.php?PageType=ShowPost&PostID=6512

There is a You can \'Vote\' on this topic at change.org: http://www.change.org/ideas/view/save_handmade_toys_from_the_cpsia

Monday, January 05, 2009

A new issue of Creative Times Magazine

To start things off this New year, a new issue of Creative Times Magazine is ready to download at the following linkhttp://www.creativetimesmagazine.com/current_issue.php.

This issue offers great organizational tips, children's crafts,
two free patterns, a prim crafter's conference feature and much more.

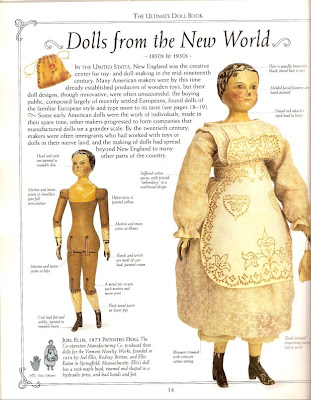
Joel Ellis 1873

There is a online doll group that is doing the"Penny Doll Challenge"
Using the Penny Doll Pattern created by Designer Claire Pruitt
I bought the pattern also though I'm not doing the challenge just kinda behind the scenes for my own personal challenge while enjoying the every ones chit chat and also frustrations..I know this pattern for me is way over my head,whew and double whew, but I am enjoying the personal challenge,
I do not work on steady just a little here and there,
I am creating my first real new 2009 doll and this is all I want to do right not, Because she is is my Antique inspired reminiscent doll of YesterYear. So I have been studying a couple of my dolls books,Looking at faces and dressing and history, One of these books is my doll book above called
"The Ultmate Doll Book by:Caroline Good fellow"
This doll caught my heart,On page 14 She is a Joel Ellis 1873, Her face and her dressing every thing I want to do but in cloth not wood, Actually her body is very similar to the Penny Doll .
What I'm doing is an all cloth doll painting her face in this style and dress..
She would be a great doll for clay over cloth ,but again I do not feel ready for clay over cloth, I want to take a class in this technique, I don't know if there is a pattern for this dimensional type head in cloth.. but this is where the painting and shading I guess comes in..

This doll below is what I'm working on until finished......
This Doll I'm working on below, is my Columbian inspired doll
I am re-dressing her, I started her two years ago just using a large of all things a Raggedy Annie Pattern so her body is not like the Columbian doll, but it is a huge dolls and I love holding her..Using pictures of the Columbian dolls I will now dress her and paint her hair on
Eck! Just got a phone call about our house and a Husband and wife want to come and walk through..keep your fngers crossed and say a prayer,, They have been talking to my husband by phone and now want to walk through..I guess no doll working for me today grrr:)

Friday, January 02, 2009

How To Make A Milk Carton Candle

How To Make A Milk Carton Candle

I saw this on my daily summary from TipNut.com
It brought back so many wonderful memories for me as a young teenager like 13yrs old and learning to make candles..I thought I'd post it here and hope it brings many wonderful memories too
Hugs Sherrie

How To Make A Milk Carton Candle

I haven’t seen these or made one in years…here’s an easy to make candle that’s an old crafty favorite. I clipped this from a 1960s magazine so it’s been around for at least a few decades…

Making Milk Carton Candles - Tipnut.com


  • All you do is take any size easy-opening milk carton, and drink up the milk, eggnog or fruit juice that’s in it.


  • Then put a regular table candle in the center, fill with crushed ice and pour hot sealing wax until full. (The plastic coating will prevent sticking.)

  • When it’s cool, cut back the carton and pull out the finished candle.

  • For extra color, decorate with rosettes or holly leaves.

  • Now all you do is light the wick,

Source: Family Circle Magazine, 1960